How to Draw Flowers in Scratch
If you’ve used Scratch’s Pen extension before, you know how to draw lines and basic shapes. But in this tutorial, we’ll go further. You’ll learn how to use the Pen together with move and repeat blocks to adjust strokes and create more complex designs—like petals that are thinner near the center and wider toward the edges.
We’ll program the Pen to draw automatically, controlling repetition, spacing, and thickness so that simple instructions can work together to produce something impressive.
This project isn’t just about making a flower—it’s about developing logical thinking and discovering how small blocks of code can create flexible, creative designs.
Who This Project Is For
-
Recommended Age: 8+
-
Skill Level: Beginner, no prior coding experience required
-
Time to Complete: 20–30 minutes (depending on familiarity with Scratch and experimenting with colors and petals)
-
Best For: Kids learning coding, parents doing at-home activities, or teachers guiding classroom projects
Learning Benefits
By following this tutorial, learners will:
-
Build logical thinking by planning loops and sequences
-
Develop problem-solving skills while adjusting variables and troubleshooting drawing issues
-
Enhance creativity through color selection and design choices
-
Gain confidence in coding fundamentals, including variables, loops, and events
What’s Covered in This Tutorial
- How to use variables to control parameters like the number of petals and pen size
- How to use loops to repeat actions and create a full circle of petals without overlap
- How to draw on the stage using Scratch’s pen extension**
- How to use sequencing to organize the order of commands
Before we start coding the flower, let’s review some key concepts and tools that will make our program work smoothly. Understanding these will help you control the Pen, create patterns, and think like a programmer.
Key Programming Concepts
Core Concepts
-
Events: Trigger actions, such as starting the program when the green flag is clicked.
-
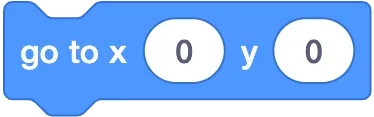
Center the Pattern: Always reset the sprite’s position before drawing. Using go to x:0 y:0 keeps the pattern centered.
-
Variables: Store and control values, such as the number of petals or pen size. Variables let the program change its behavior dynamically.
-
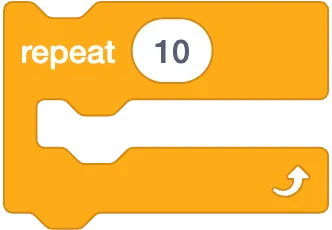
Loops: Repeat a set of instructions multiple times to create patterns, like a full circle of petals, saving time and keeping your code concise.
-
sequencing: Organize commands in the correct order to ensure the program runs as expected.
Pen Tools & Tips
-
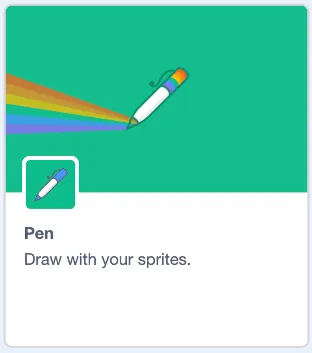
Pen Extension: Allows the sprite to draw on the stage. You can control pen color, pen size, and clearing the drawing.
-
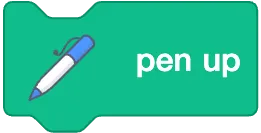
Pen Up / Pen Down: Pen Up stops the sprite from drawing; Pen Down starts it again.
-
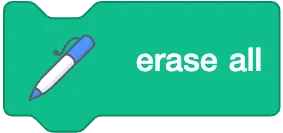
Erase All: Clears the stage of all pen drawings.
Step-by-Step: Coding Your Flower in Scratch
Now that we review the core programming concepts, it’s time to turn our knoledge into code. Using the Pen extension, loops, and variables, we’ll create a colorful flower that draws itself automatically. Follow these steps:
Using Variables to Draw Any Polygon
Creative Techniques & Effects
-
Like every other progam we need a when green flag click to .. a
-
Center the Drawing Use “go to x: 0 y: 0” to make sure your flower is drawn in the center of the stage.You can adjust the numbers if you want to draw it in someother position.
-
Prepare the Pen after adding the pen extension from the … the purple Extensions button at the bottom-left of the editor) and add the Pen extension. Add “set pen size to 1” at the start. Set the initial pen color, for example, red. pen down to be abale to draw
-
Draw Petals now it is ready to use move to draw . for example moving 10 steps , it is the simple usage of pen so it draw a simple line. to make a longer line we need eaither a larger size to move or repeating a series of tiny lines? correct? so we use repeat for exapmle 10 times that move to create a longer line. we use this because in a few steps you can see how it helps us. ok but we need a petal. what can we do to create sth like a petal? as we mentioned before the petal us tinier the center side and ticker in the end . is it not like we use diffrent pen size ? form tiny to thick? let’s try it ?
-
Controlling Petals with Variables
Variables let you adjust the number of petals and their size without rewriting your code. For example:
Set a variable called Petals to control how many petals your flower has.
Use a loop to repeat the drawing of each petal the number of times stored in the variable. This makes your design fully customizable—you can experiment with different numbers of petals to see how it changes the look of your flower.
- Using Loops to Create Full Circles
Instead of manually drawing each petal, loops allow the sprite to automatically turn and draw repeatedly, forming a perfect circle. By dividing 360° by the number of petals, each petal is evenly spaced. This ensures the flower looks balanced and clean.
- Adjusting Pen Size for Depth
Changing the pen size can add depth and style to your petals:
Make the pen thinner near the center and thicker toward the edge for a natural petal effect.
Set the pen size at the start of the loop and adjust it dynamically while drawing each petal.
- Adding Color with Pen
Scratch lets you change the pen color as you draw. By incrementing the pen color slightly for each petal, you can create a rainbow or gradient effect:
Start with a base color, like yellow or pink.
Add a small value to the pen color each time a petal is drawn. This creates a beautiful, vibrant flower without any extra code.
- Combining Everything
By combining variables, loops, pen size, and color:
You can draw a flower with as many petals as you like.
Each petal can have its own thickness and color.
The center can be drawn with a larger pen size for the pollen area.
With these techniques, your simple Scratch blocks become a powerful toolkit for creative programming. You’re not just drawing a flower—you’re experimenting with logic, repetition, and design to make something visually impressive and dynamic.
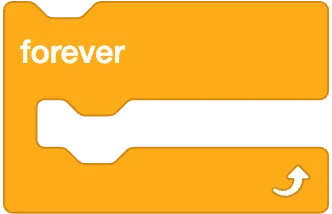
To make the shape respond when the sliders change, we place the drawing code inside a forever loop.
This means Scratch keeps checking the values of the sliders and redraws the shape whenever they change, so you can see the result instantly.
This project may look simple, but it introduces an important programming idea. Instead of using fixed values and repeating the same code over and over, we write shorter, smarter, reusable code that adapts to different values.
Common Problems and How to Fix Them
|
Try These Challenges
- Animate the shape by rotating it slightly between repeats
- Change or randomize pen color to make the drawing more colorful and alive.
- Use ask blocks to let users type custom values
- Combine multiple polygons to create patterns or complex designs
Finished This Tutorial?
If you’d like to take this idea further, the next project shows you how to draw patterns in Scratch using polygons.:
If you’re interested in more projects like this, check out my YouTube channel, where I regularly share Scratch tutorials to help you explore, learn, and create.
TheSTEAMist